In this article we show you the easy way to edit your hosts file on Windows, Mac and Linux. We also go over how to flush your DNS resolver cache.
Please note: that editing the hosts file requires administrator/root privileges.
Most of the guides I have seen on this topic while accurate are also pretty over complicated.
For Windows:
The hosts file is located: C:\Windows\System32\drivers\etc\hosts
To open this file and edit as admin:
Open powershell: The fastest way to open PowerShell is via a Start Menu Search. Just click the Start or Search icon, and then type “powershell” in the search box.
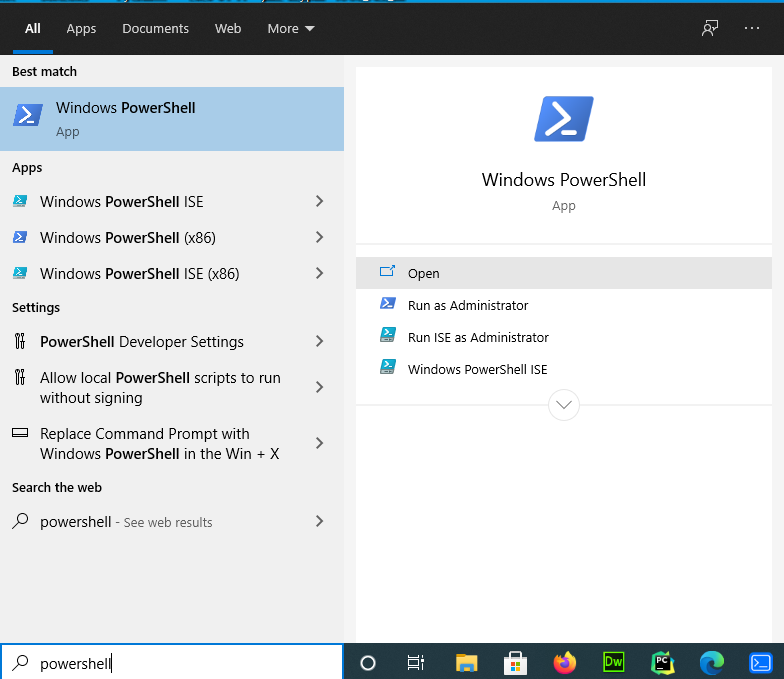
With powershell open you can then paste the below command via right click and hit enter. This will open notepad as administrator and edit the hosts file all in one go. You will see a UAC prompt due to the administrator privileges needed.
powershell -c start -verb runas notepad.exe 'C:\Windows\System32\drivers\etc\hosts'
To flush dns and then edit the hosts file you can use the second one to save yourself that step later.
ipconfig /flushdns; powershell -c start -verb runas notepad.exe 'C:\Windows\System32\drivers\etc\hosts'
For a visual walk through see the below.


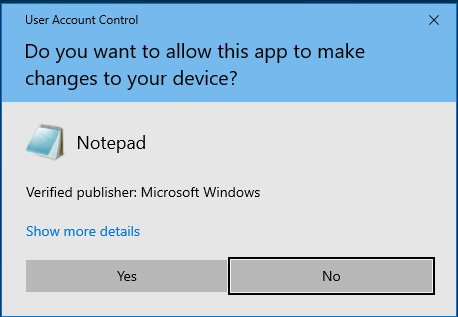
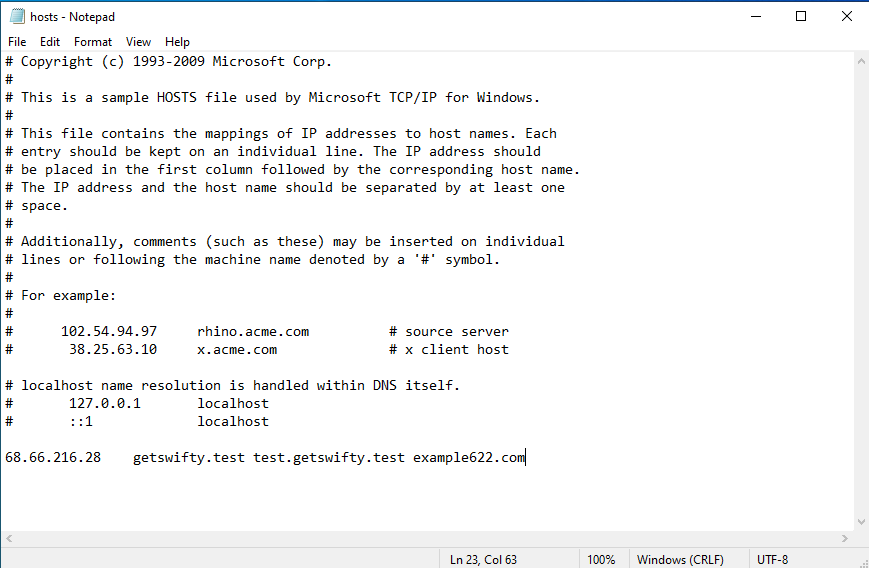
Once you have made changes you will want to have flushed dns resolver’s so that any cached entries are cleared and the new entries added are used. This is covered in the second command but can be done via the below manually if you still have notepad opened and are editing and saving and need to flush between edits.
ipconfig /flushdns
For Linux:
The hosts file is located at: /etc/hosts
To edit this via a GUI graphical editor in Ubuntu/Debian one of the below commands can be used to open via xed/gedit which are the default graphical editors in Mint Linux and etc.
Linux Mint:
xed admin:///etc/hosts
Ubuntu/Debian:
gedit admin:///etc/hosts
For cases where you may not have those installed the below alternatives will also work and edit via your default terminal editor.
sudoedit /etc/hosts
sudo nano /etc/hosts
To flush your resolver cache in linux see the below. There 3 main resolvers and hence ways to do this based on the local OS resolver setup.
- systemd-resolved
- dnsmasq
- nscd
For clearing systemd-resolver the below can be used.
sudo systemctl is-active systemd-resolved.service && sudo systemd-resolve --flush-caches
For clearing dnsmasq the below can be used.
sudo systemctl is-active dnsmasq.service && sudo systemctl restart dnsmasq.service;
For clearing nscd the below can be used.
sudo systemctl is-active nscd.service && sudo systemctl restart nscd.service ;
If you don’t know which one your’s is using you can also just try the below string which chains all the above and only runs if any one of those services is active it will then restart it to flush it.
sudo systemctl is-active systemd-resolved.service && sudo systemd-resolve --flush-caches; sudo systemctl is-active dnsmasq.service && sudo systemctl restart dnsmasq.service; sudo systemctl is-active nscd.service && sudo systemctl restart nscd.service ;
If your on a legacy system or one without systemd and uses upstart/init you can use something like the below to restart dnsmasq or nscd.
sudo service dnsmasq restart; sudo service nscd restart ;
For Mac:
The hosts file is located in: /etc/hosts or /private/etc/hosts
You can edit this via one of the below commands:
Newer Macs:
sudo nano /etc/hosts
Older Macs:
sudo nano /private/etc/hosts
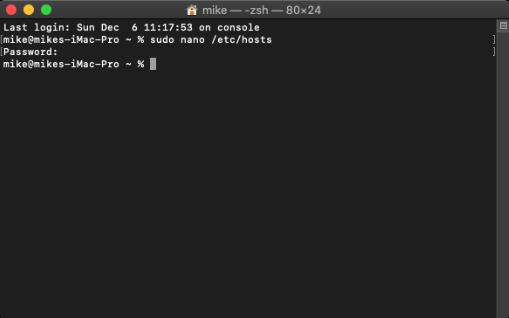
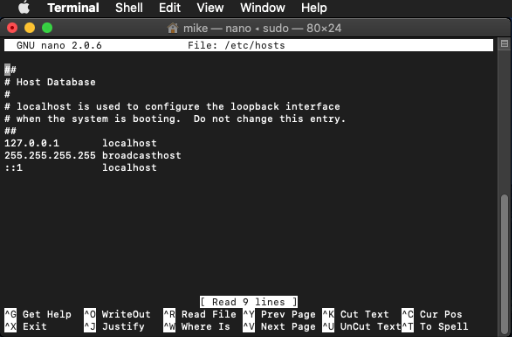

To flush DNS:
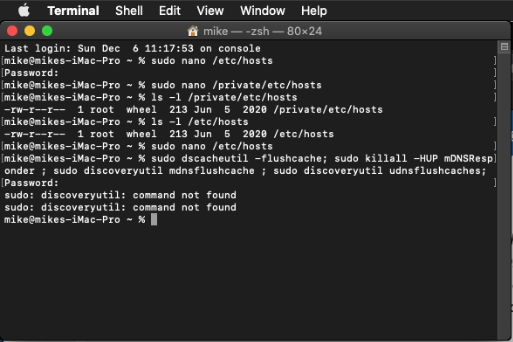
The below command can be used. Please Note: If any one of them errors it is safe to ignore. MacOS depending on the version has different ways to flush the DNS. The beauty of the below command is that is accounts for all of them in one command if the legacy ones fail it doesn’t matter as it will have still flushed the cache no matter which version.
sudo dscacheutil -flushcache; sudo killall -HUP mDNSResponder ; sudo discoveryutil mdnsflushcache ; sudo discoveryutil udnsflushcaches;
Optimize your workflow:
If you find yourself doing lots of development work, migrations, and troubleshooting where you need to quickly edit your hosts file to check a site on old and new server or with and without the CDN/WAF the above steps can be pretty time consuming even with the super simple methods i condensed from being multiple steps into one or 2 commands per OS.
In the Wizard Assistant desktop app this whole process is even more refined where you can initiate the editing and dns flushing from one click inside the apps Tools menu for Windows and Linux. See example below of it in action.