Please see our new Documentation in this link. The below is the older guide which is going to be replaced soon.
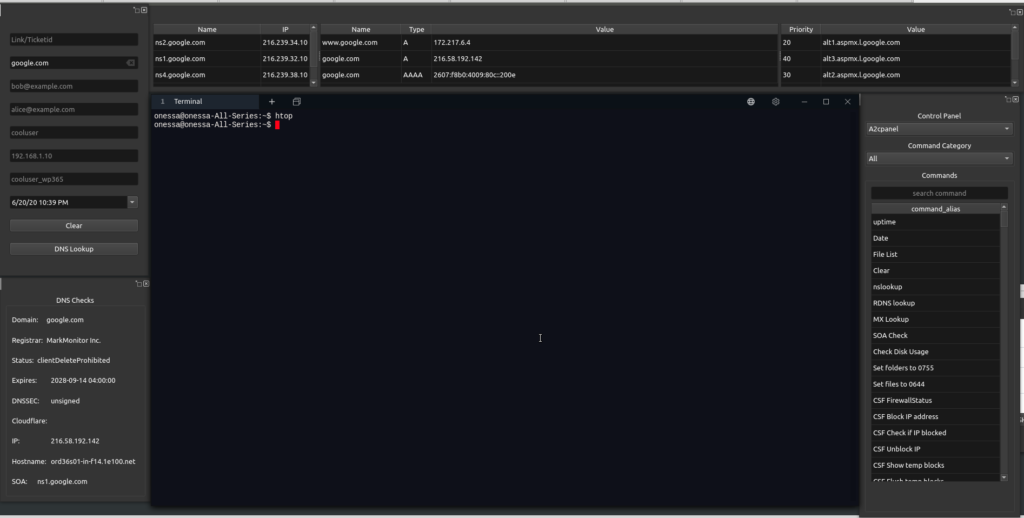
User interface overview.
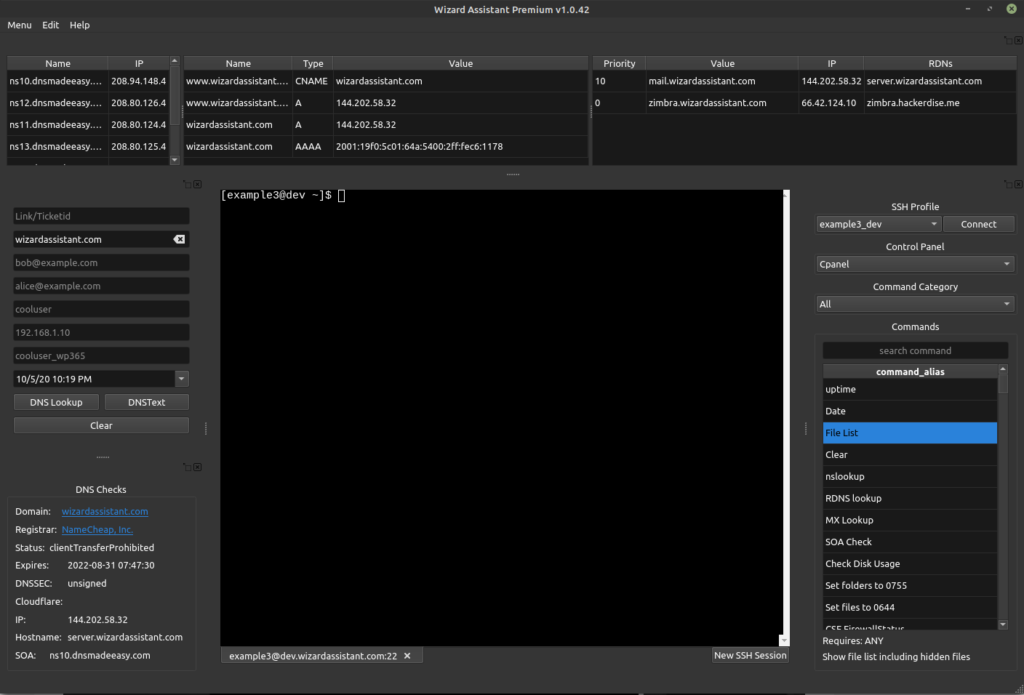
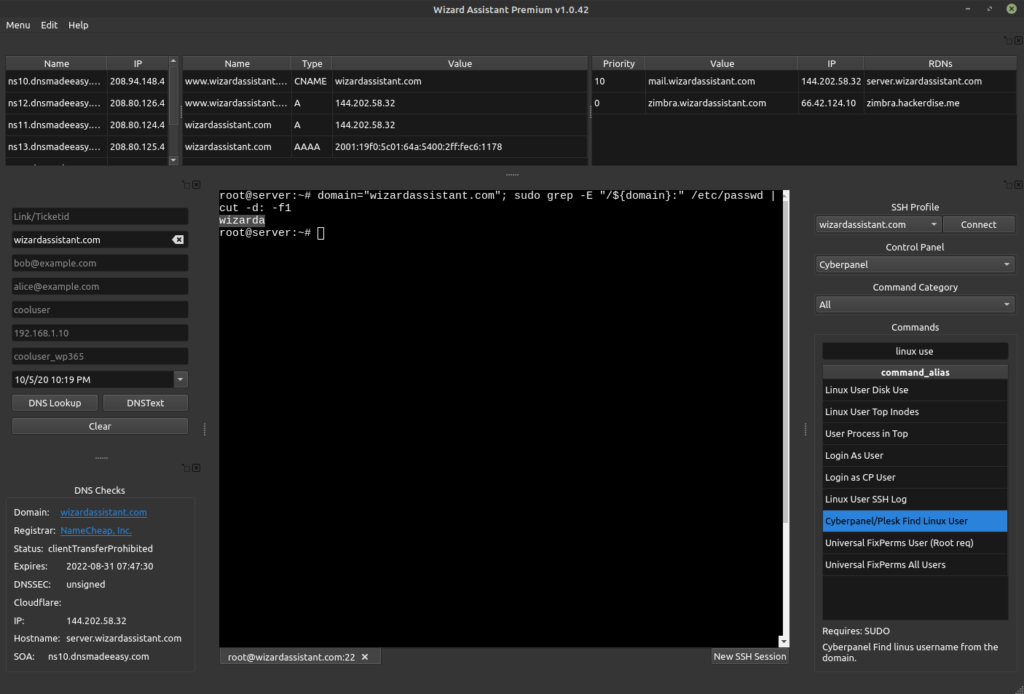
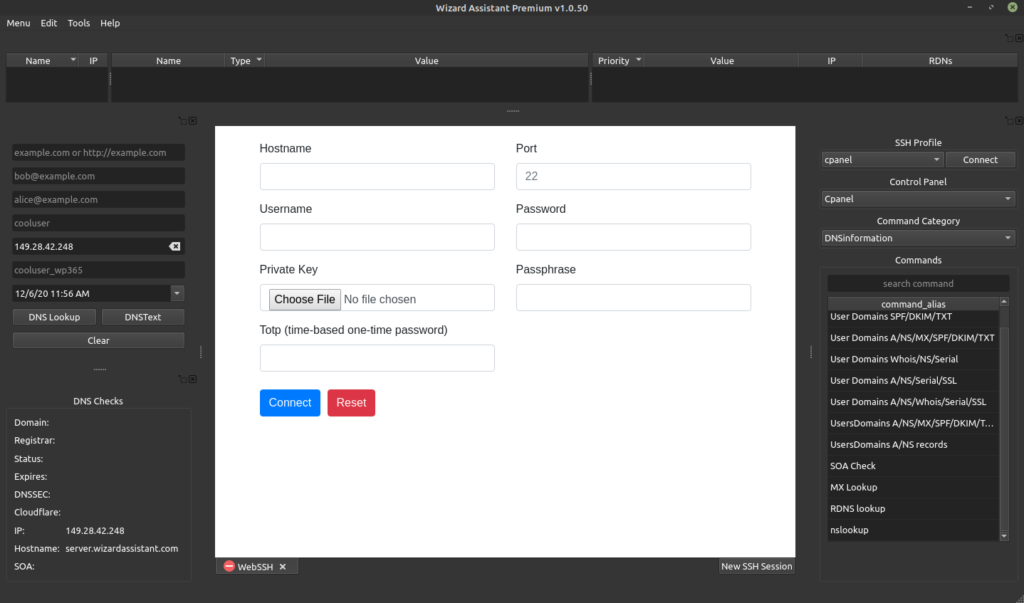
Form Input:
The form input is where you put in anything you know about the issue such as domain email adddresses etc. Based on what you put in this populates the relevant commands dynamically.
Things to note:
Not all of the fields need filled in. You can fill in with only a username or nothing at all if its a static command.
The domain is parsed from the domain field or the first email address fields if any one of those is filled in.
SSH Terminal:
The ssh terminal central widget works with username/password and also the native ssh agent for Linux/Mac and the Putty pageant agent for Windows.
It also supports 2FA ssh logins thanks like Duo and will offer interactive prompt to choose how to send the 2FA auth or enter OTP code.
It is a multi-tabbed terminal so clicking to the right of the existing tab will spawn a new tab just like it does in a browser(Premium Feature). For more information about how that works see the PyPi link here. This portion of the app is opensource.
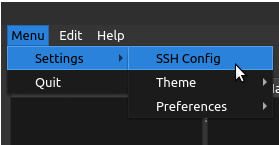
SSH Config
The application has SSH profile and config support which gives Windows users an easy and integrated way to use SSH keys with passphrases saved and click to connect profile support with Premium license.
To manage your SSH config navigate to Menu > Settings > SSH Config.
Once opened it will show something like this where you can add your ssh logins into your custom sshconfig sqlite3 db.
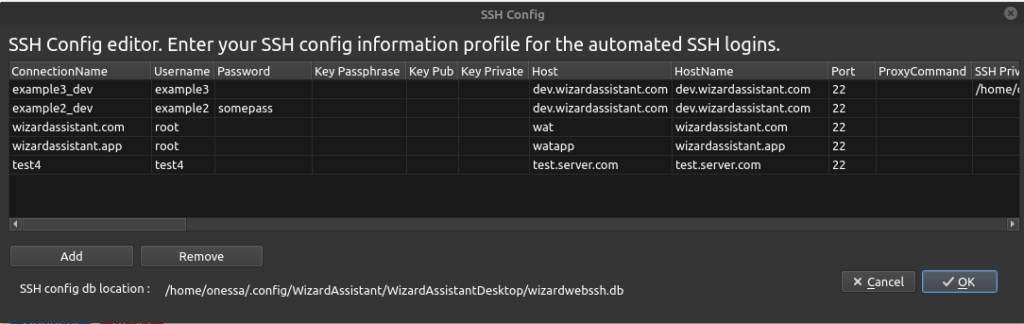
You can embed your entire raw keypairs or put the full path to the keyfiles on the local system. This makes copying your profile from desktop to laptop or backup system a breeze.
These logins never leave your system and are stored in the path it shows. You can also use an Sqlite3 editor like DB Browser or similar to edit them if you prefer doing so that way and need to bulk edit or insert stuff.
A special note for Linux/Mac users with SSH key agents you can put in just the connection name along with the hostname and username and your native key agent will handle the keyfiles and passphrases without entering here. This gives you full control and simplicity if desired in the config which works uniformly across platforms.
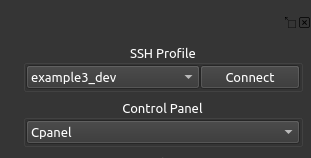
SSH Profile quick connect
Once you have profiles added and restart the app you will see your new profiles in the top right with a connect button like the below. Clicking connect will open a new SSH session tab and login you right in with the SSH profile details provided.
Control Panel Dropdown:
This drop-down menu allows you to switch the OS/Control Panel profile loaded so that you can switch between working on say a cPanel or Cyberpanel server on the fly. Companies and individuals on the Corporate or premium subscription plans will be able to add custom profiles with all their specific log file paths and binaries and select it or set this as the default for their users and restrict commands.
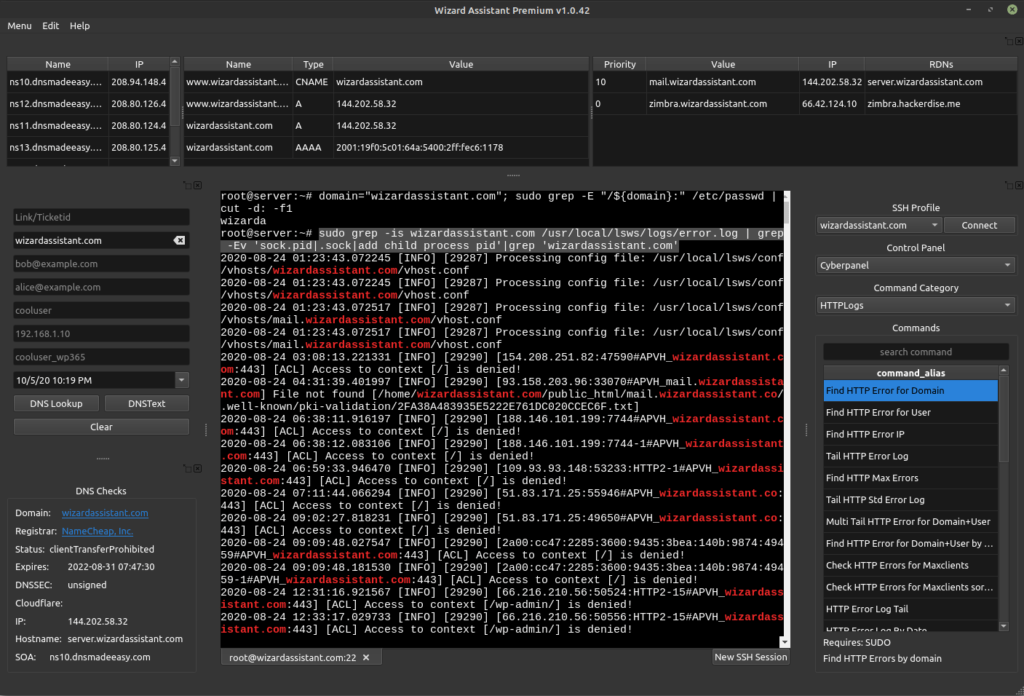
Command Category Dropdown:
This drop-down menu allows you to switch the category of commands loaded in the commands list box below it. There are alot of commands so this helps filter them by category. Search also allows searching by command_alias name or description across the commands table. In premium versions you will be able to add/edit categories and commands as desired.
Special Note: The categories that start with “Advanced” tend to be things that would require root access or sudo root level privileges commonly used by L2 or Advanced Level techs and sysadmins and should be used with care.
Commands:
In this section you will see commands based on the command category dropdown selected.
When you single click(left click) on a command it automatically adds that command to your clipboard for use. For dynamic commands this will be based off the current form input and selected Control Panel profile loaded.
Premium users can double left click a command to execute it in the terminal without needing to copy and paste, shift+insert, or middle click mouse if on Linux.
We have added descriptions to show when a command is clicked. We also plan to have an extensive command index of what each thing does and what it can and should be used for in the future. All of the commands already have the privileges required noted along with descriptions in the database the filtering for this is just not implemented at this time. This will be useful for companies which will want to hide or restrict commands for some things based on user level.
Special Note: If you have not used a command before we recommend clicking it to copy to clipboard and then paste it into a notepad first to review it if you are curious about what it does or how it does it. You can then paste it into the terminal when ready to execute it.
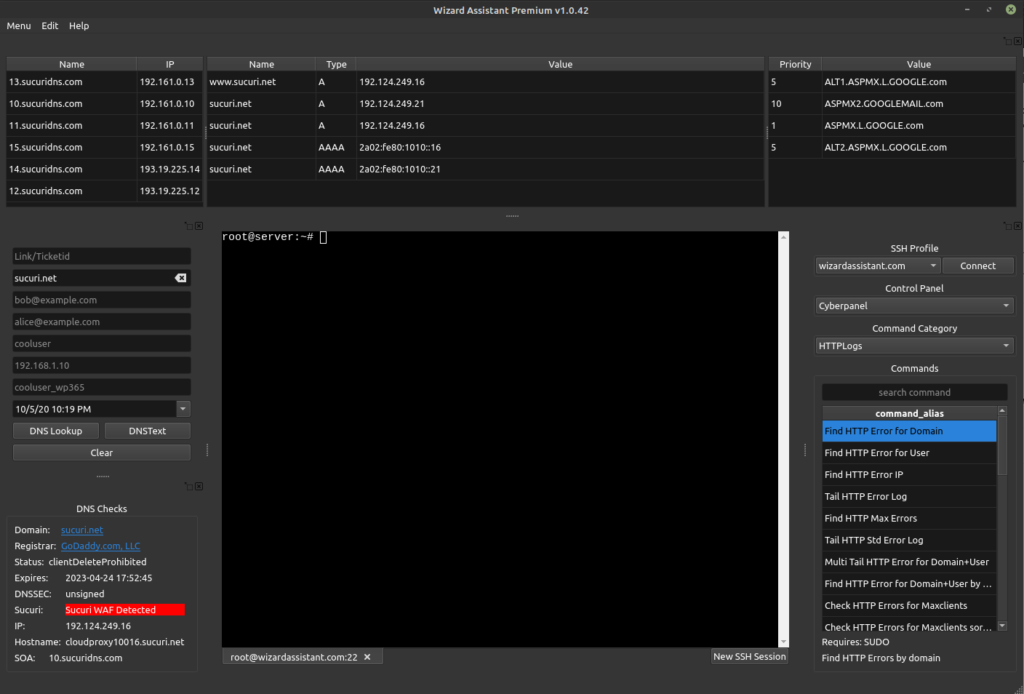
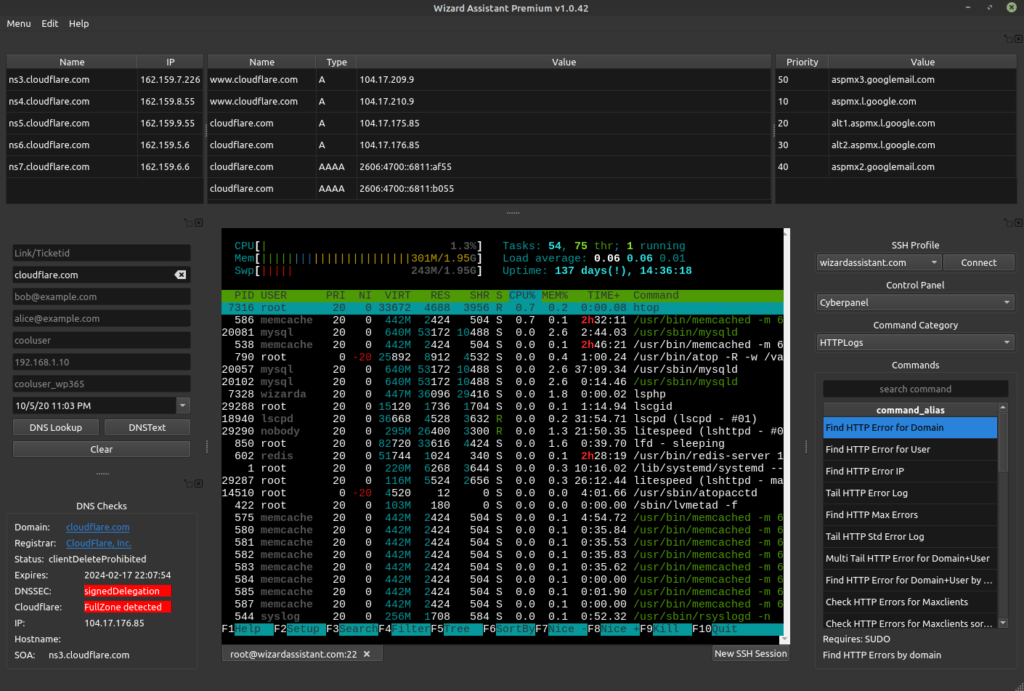
Whois and DNS lookups:
This section should be self explanatory, but for clarity anytime the DNS lookup button is submitted a Whois/DNS lookup is done for the domain variable parsed from the domain or email address field. This helps you spot if the issue you working on is actually on the server you think it is and also provided insight to know if domain is using a Proxy like Sucuri/Cloudflare/Quic.cloud WAF which could be causing a problem.
For PTR/RDNS lookups of a specific IP this can be done by entering the IP in form field IP field and hitting DNS Lookup.
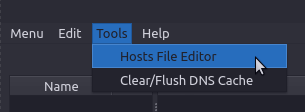
Hosts file Editing and Flushing DNS(Premium Feature)
The app has the ability to open your OS specific hosts file for editing and also clear/flush DNS. This makes it so easy to troubleshoot a variety of issues.
One case is for migrations teams where they need to check source and see if an issue existed on old server before migration and client is pretending like you broke their site hoping you’ll just fix their developer related issue.
Another really super handy use for this is when you need to check or bypass a WAF(Web Application Firewall) or CDN(Content Delivery Network) like CloudFlare, Sucuri, or Quic.cloud to see if the issue is related to the WAF/CDN or verify if the site your looking at hidden behind a WAF is actually pointed to the correct server. You can put a test file on the server and test with and without hosts file to see its in WAF/CDN to confirm the DNS is pointed to the servers you control.
To edit your hosts file: Navigate to the Tools Menu > Hosts File Editor
It will then spawn an elevated admin/sudo/UAC prompt and open the hosts file for editing and flush the dns resolver cache.
See below video for how slick this process is with the app for Windows and Linux. If on Linux I highly recommend following our guide here for setting up passwordless sudo access to the hosts file editor and systemd dns resolver flush services.
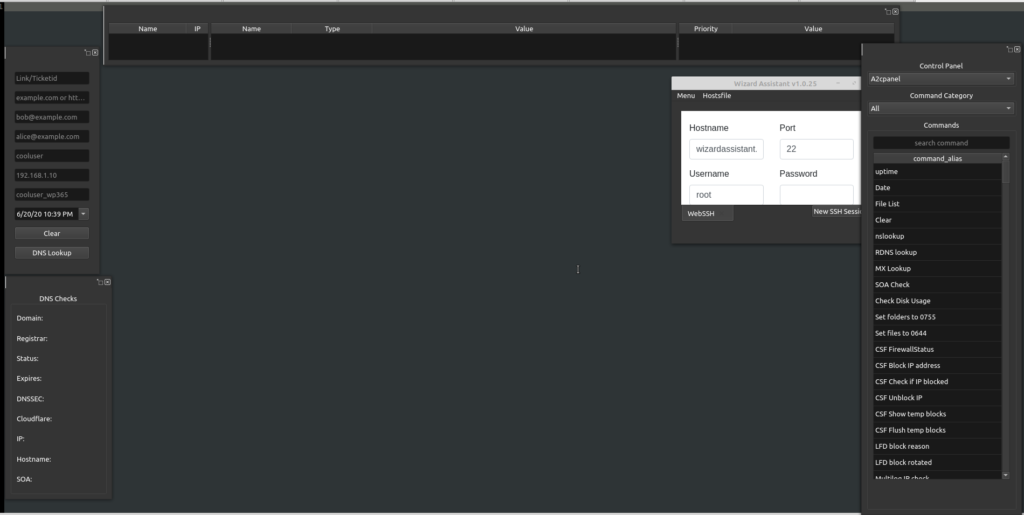
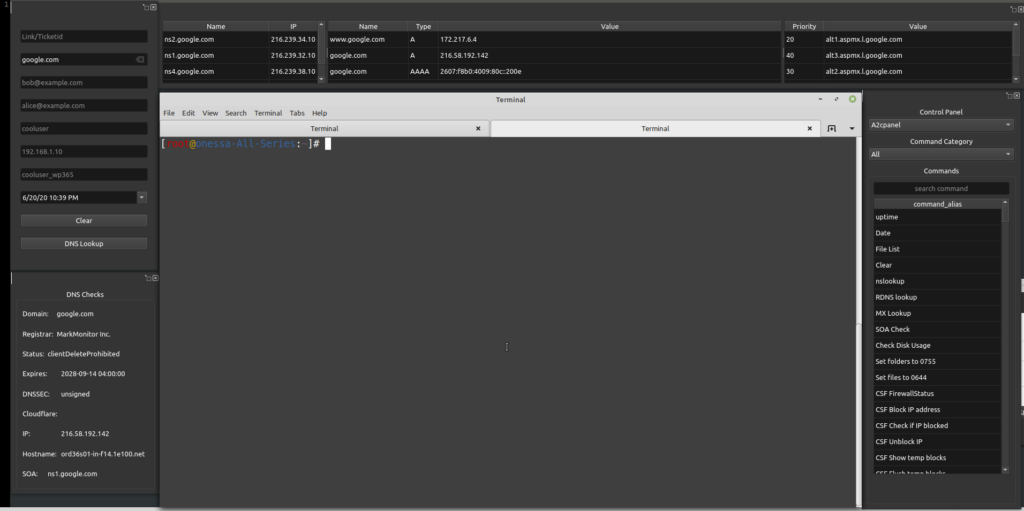
Undock BYOT(Bring Your Own Terminal) mode
Another common request based on the beta testing was to be able to use a custom terminal vs the built in one in the app. This is going to be a premium feature but is available now for testing in the beta test. This also allows you to split the widgets across multiple monitors or desktops if desired for maximum productivity. As more tools are released there will be more selectable and configurable widgets added.

Theme Light/Dark mode Toggling

To change from the default Dark Mode theme you can toggle this in the menu by selecting the desired mode and then closing and restarting the app. It will then load in that mode going forward.

For more user guides and tutorial content checkout our YouTube Channel and Video tutorials page.